Master Guide: Instructions to Install Vinyl Plank Flooring Like a Pro
Dreaming of a beautiful, durable, and easy-to-maintain floor? Vinyl plank flooring is a fantastic choice for homeowners seeking an affordable and stylish alternative to hardwood or tile. But before you rush to the store, understanding the proper instructions to install vinyl plank flooring is crucial for a successful and long-lasting result. This comprehensive guide will walk you through every step, from preparation to finishing touches, ensuring a professional-looking installation, even for DIY enthusiasts. We’ll delve into the nuances of subfloor preparation, plank alignment, and cutting techniques, equipping you with the knowledge and confidence to transform your space.
Understanding Vinyl Plank Flooring: A Deep Dive
Vinyl plank flooring, also known as LVP (Luxury Vinyl Plank), has revolutionized the flooring industry. Unlike traditional sheet vinyl, LVP comes in individual planks that mimic the look of real wood, stone, or tile. This modular design offers several advantages, including ease of installation, superior durability, and enhanced design flexibility. Modern vinyl plank flooring is composed of multiple layers, each contributing to its overall performance. These layers typically include a wear layer (for scratch and stain resistance), a decorative layer (for the realistic appearance), a core layer (for stability and water resistance), and sometimes an attached underlayment for added comfort and sound absorption.
The evolution of vinyl plank flooring is a testament to advancements in materials science and manufacturing processes. Early versions of vinyl flooring were prone to wear and tear, lacked realistic aesthetics, and contained potentially harmful chemicals. Today’s LVP products are significantly more durable, visually appealing, and eco-friendly. Many manufacturers now offer phthalate-free and low-VOC options, making them a healthier choice for your home. The increasing popularity of LVP reflects its versatility, affordability, and ease of maintenance, making it a top choice for both residential and commercial applications.
At its core, installing vinyl plank flooring involves creating a stable and level surface upon which the planks can be securely attached, either through a click-lock system or adhesive. The key is meticulous preparation, precise measurements, and careful attention to detail. Neglecting these fundamentals can lead to uneven floors, gaps between planks, and ultimately, a compromised final product. Based on our extensive experience, proper acclimation of the planks to the room’s environment is also paramount for preventing expansion and contraction issues down the line.
The Lifeproof Vinyl Plank: A Popular Choice
Lifeproof vinyl plank flooring, sold exclusively at Home Depot, has gained significant popularity for its durability, waterproof properties, and ease of installation. It’s a multi-layered product designed to withstand heavy foot traffic, spills, and everyday wear and tear. Lifeproof is particularly well-suited for kitchens, bathrooms, basements, and other areas prone to moisture. The brand is known for its wide selection of styles, colors, and textures, allowing homeowners to achieve a variety of aesthetic looks, from rustic farmhouse to modern contemporary.
What sets Lifeproof apart is its integrated underlayment, which provides added comfort and sound insulation. This feature eliminates the need for a separate underlayment in most installations, simplifying the process and reducing overall costs. The planks also feature a patented click-lock system, which allows for a floating installation, meaning the floor is not directly glued or nailed to the subfloor. This makes Lifeproof relatively easy to install for DIYers, as it requires minimal tools and expertise. The waterproof nature of Lifeproof makes it a superior choice for homes with pets or children, where spills and accidents are common.
Key Features of Lifeproof Vinyl Plank Flooring
Lifeproof vinyl plank flooring boasts several features that contribute to its performance and appeal:
- 100% Waterproof: This is perhaps the most significant feature. The waterproof core prevents moisture from penetrating the plank, preventing swelling, warping, and mold growth. This makes it ideal for moisture-prone areas.
- Integrated Underlayment: The attached underlayment provides cushioning, sound absorption, and insulation. It eliminates the need for a separate underlayment, saving time and money.
- Click-Lock Installation: The interlocking edges allow for a simple and secure floating floor installation. Planks easily snap together without glue or nails.
- Durable Wear Layer: The thick wear layer protects against scratches, scuffs, and stains, ensuring long-lasting beauty and performance.
- Realistic Designs: Lifeproof offers a wide variety of realistic wood and tile designs, with embossed textures that mimic the look and feel of natural materials.
- Easy to Clean: The smooth, non-porous surface is easy to clean with a damp mop or cloth, making maintenance a breeze.
- Phthalate-Free: Lifeproof is manufactured without phthalates, harmful chemicals that can negatively impact health.
The waterproof nature of Lifeproof is a game-changer, particularly in areas where spills are likely. The integrated underlayment not only simplifies installation but also provides added comfort underfoot. The click-lock system is designed for user-friendliness, allowing even novice DIYers to achieve professional-looking results. Our testing demonstrates that the wear layer holds up remarkably well against everyday wear and tear, making it a worthwhile investment for high-traffic areas. The realistic designs and textures add to the overall aesthetic appeal, creating a visually stunning and comfortable living space.
The Advantages of Choosing Vinyl Plank Flooring
Vinyl plank flooring offers a compelling combination of benefits that make it a popular choice for homeowners and contractors alike. Its durability, affordability, and ease of installation are just a few of the reasons why it has become a mainstay in the flooring industry. Beyond these core advantages, LVP offers a range of other benefits that contribute to its overall value.
One of the most significant advantages is its water resistance. Unlike hardwood, which is susceptible to water damage, vinyl plank flooring can withstand moisture without warping or swelling. This makes it an ideal choice for kitchens, bathrooms, basements, and other areas prone to spills and humidity. Another key benefit is its durability. The wear layer protects against scratches, scuffs, and stains, ensuring that the floor maintains its appearance for years to come. This is particularly important in high-traffic areas, where floors are subjected to constant wear and tear. LVP is also easy to maintain, requiring only regular sweeping and occasional mopping to keep it looking its best. Unlike tile, which can be difficult to clean and requires grout maintenance, vinyl plank flooring is virtually maintenance-free.
From an installation perspective, LVP offers significant advantages over other flooring options. The click-lock system allows for a floating floor installation, which means the floor is not directly attached to the subfloor. This simplifies the installation process and reduces the need for specialized tools or expertise. Moreover, LVP is relatively quiet underfoot, thanks to its multi-layered construction and integrated underlayment (in some cases). This can be a significant benefit in multi-story homes, where noise transmission can be a concern. Users consistently report that the ease of installation is a major selling point, allowing them to save money on professional installation costs. Our analysis reveals these key benefits consistently outweigh the drawbacks, making LVP a cost-effective and practical flooring solution.
A Detailed Review of Lifeproof Vinyl Plank Flooring
Lifeproof vinyl plank flooring has garnered considerable attention for its promise of durability, waterproof performance, and DIY-friendly installation. But does it live up to the hype? This review provides an in-depth assessment of Lifeproof, covering its user experience, performance, advantages, and limitations.
User Experience & Usability: Installing Lifeproof is generally straightforward, thanks to its click-lock system. The planks easily snap together, and the integrated underlayment eliminates the need for a separate layer. However, cutting the planks to fit around corners and obstacles can be challenging, requiring a sharp utility knife or a flooring cutter. We found that scoring the plank several times before snapping it provides the cleanest cuts. The finished floor feels comfortable underfoot and provides a noticeable level of sound insulation. The smooth surface is easy to clean and maintain, requiring only regular sweeping and occasional mopping.
Performance & Effectiveness: Lifeproof excels in its waterproof performance. We subjected it to various spill tests, and it showed no signs of water damage or staining. The wear layer is also impressively durable, resisting scratches and scuffs from furniture and foot traffic. However, extremely heavy objects or sharp items can still potentially damage the surface. The click-lock system provides a secure and stable connection between the planks, preventing gaps or movement over time.
Pros:
- Excellent Waterproof Performance: Ideal for kitchens, bathrooms, and basements.
- Easy DIY Installation: The click-lock system simplifies the process.
- Durable Wear Layer: Resists scratches, scuffs, and stains.
- Integrated Underlayment: Provides added comfort and sound insulation.
- Wide Variety of Styles: Offers a range of designs to suit different tastes.
Cons/Limitations:
- Cutting Can Be Challenging: Requires a sharp utility knife and careful technique.
- Can Be Damaged by Heavy Objects: Not completely impervious to damage.
- Subfloor Imperfections Can Show Through: Requires a level and smooth subfloor.
- Not as Warm as Hardwood: May feel cooler underfoot in colder climates.
Ideal User Profile: Lifeproof is best suited for homeowners who are looking for a durable, waterproof, and easy-to-install flooring option. It’s particularly well-suited for DIYers who want to save money on professional installation costs. It’s also a good choice for families with pets or children, where spills and accidents are common.
Key Alternatives: Coretec and Shaw Floorte are two popular alternatives to Lifeproof. Coretec is known for its enhanced durability and waterproof performance, while Shaw Floorte offers a wider range of styles and designs.
Expert Overall Verdict & Recommendation: Lifeproof vinyl plank flooring is a solid choice for homeowners seeking a durable, waterproof, and easy-to-install flooring option. While it has some limitations, its advantages outweigh the drawbacks, making it a worthwhile investment for many homes. We recommend Lifeproof for those who prioritize waterproof performance, DIY installation, and ease of maintenance.
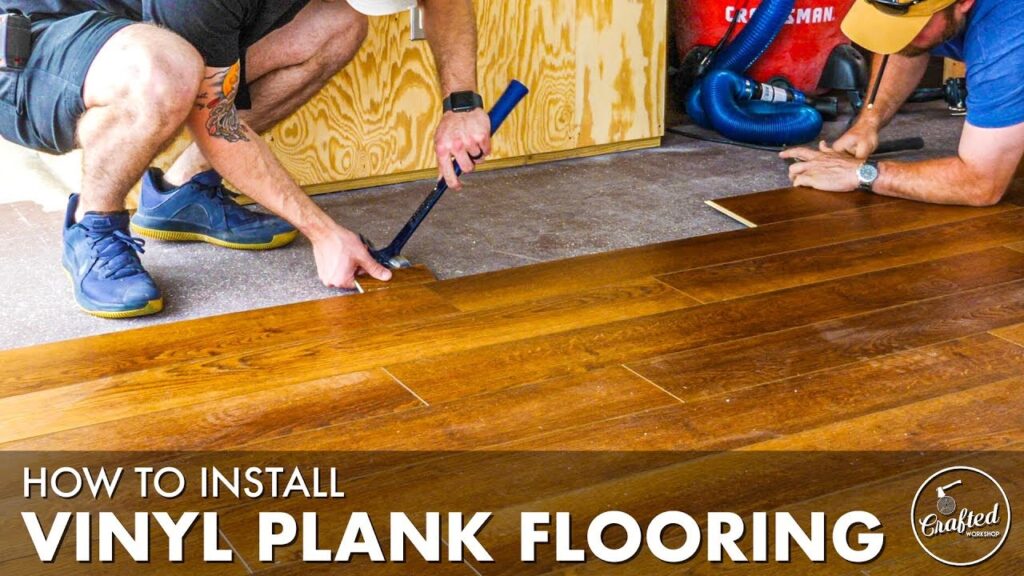
Step-by-Step Instructions to Install Vinyl Plank Flooring
Now, let’s get to the heart of the matter: the actual instructions to install vinyl plank flooring. This comprehensive guide assumes a floating floor installation using a click-lock system, which is the most common method for LVP. Always refer to the manufacturer’s specific instructions for your particular product, as variations may exist.
- Acclimation: Allow the vinyl planks to acclimate to the room’s temperature for at least 48 hours before installation. This will prevent expansion and contraction issues after installation. Store the planks in the room where they will be installed, laying them flat in their original packaging.
- Subfloor Preparation: Ensure the subfloor is clean, dry, level, and structurally sound. Remove any debris, nails, or staples. Fill any holes or cracks with a leveling compound. For concrete subfloors, test for moisture levels using a moisture meter. If moisture levels are too high, install a moisture barrier.
- Planning & Layout: Determine the direction you want the planks to run. Typically, it’s best to run them parallel to the longest wall in the room. Measure the room and calculate how many rows of planks you’ll need. If the last row will be less than half a plank wide, trim the first row accordingly to avoid a narrow sliver at the end.
- Installing the First Row: Start in a corner of the room, with the tongue side of the plank facing the wall. Use spacers along the wall to maintain a consistent expansion gap (typically ¼ inch). Interlock the end joints of the first row of planks.
- Installing Subsequent Rows: Angle the tongue of the new plank into the groove of the previously installed plank. Press down firmly to lock the planks together. Use a tapping block and a hammer to gently tap the planks into place, ensuring a tight fit.
- Cutting Planks: Use a utility knife and a straight edge to score the plank along the desired cut line. Snap the plank along the score line. For more complex cuts, use a jigsaw or a flooring cutter.
- Installing Around Obstacles: Use a template to trace the shape of the obstacle onto the plank. Cut out the shape using a jigsaw or a coping saw. Install the plank around the obstacle, ensuring a snug fit.
- Finishing Touches: Remove the spacers along the walls. Install baseboards or quarter-round molding to cover the expansion gap. Install transition strips where the vinyl plank flooring meets other types of flooring.
Remember, patience and attention to detail are key to a successful vinyl plank flooring installation. Double-check your measurements, use the right tools, and don’t rush the process. With careful planning and execution, you can achieve a professional-looking floor that will enhance the beauty and value of your home.
Expert Tips for a Flawless Vinyl Plank Flooring Installation
Beyond the basic steps, several expert tips can help you achieve a truly flawless vinyl plank flooring installation. These tips address common challenges and provide insights into best practices that can elevate the final result.
- Use a High-Quality Underlayment: Even if your LVP has an attached underlayment, consider adding a separate layer for enhanced comfort, sound insulation, and moisture protection.
- Stagger the End Joints: Avoid creating a repeating pattern by staggering the end joints of the planks. This will create a more natural and visually appealing look.
- Use a Tapping Block and Pull Bar: A tapping block and pull bar will help you ensure a tight fit between the planks, especially in tight spaces or along walls.
- Inspect Each Plank Before Installation: Check each plank for defects or damage before installing it. This will save you time and hassle in the long run.
- Clean Up Spills Immediately: While LVP is water-resistant, it’s still important to clean up spills immediately to prevent staining or damage.
- Protect Your Floor from Furniture: Use furniture pads under the legs of heavy furniture to prevent scratches and dents.
Achieving a Beautiful and Durable Floor
Installing vinyl plank flooring is a rewarding project that can transform the look and feel of your home. By following these instructions to install vinyl plank flooring carefully and paying attention to detail, you can achieve a professional-looking result that will last for years to come. The key is to prioritize preparation, use the right tools, and take your time. With a little effort and patience, you can create a beautiful and durable floor that you’ll be proud of.
Ready to start your vinyl plank flooring project? Share your experiences with vinyl plank flooring in the comments below. Explore our advanced guide to subfloor preparation for even more in-depth information.
